
Introduction
Most cameras just capture pixels and hand them off to something else to figure out what’s actually in the frame. The Raspberry Pi AI Camera does something different — it thinks about what it’s seeing before the image even leaves the sensor. That’s a genuinely different way of building vision-based AI projects, and it’s why this small $70 module has become one of the more talked-about accessories in the Raspberry Pi ecosystem since it launched.
If you’re researching the Raspberry Pi AI camera because you’re planning a robotics build, a home security project, or you just want to get hands-on with edge AI without wrestling with a separate accelerator board, this guide covers what the hardware actually does, how setup works in practice, where people commonly get stuck, and what I’ve learned building with it myself.
What Is the Raspberry Pi AI Camera?
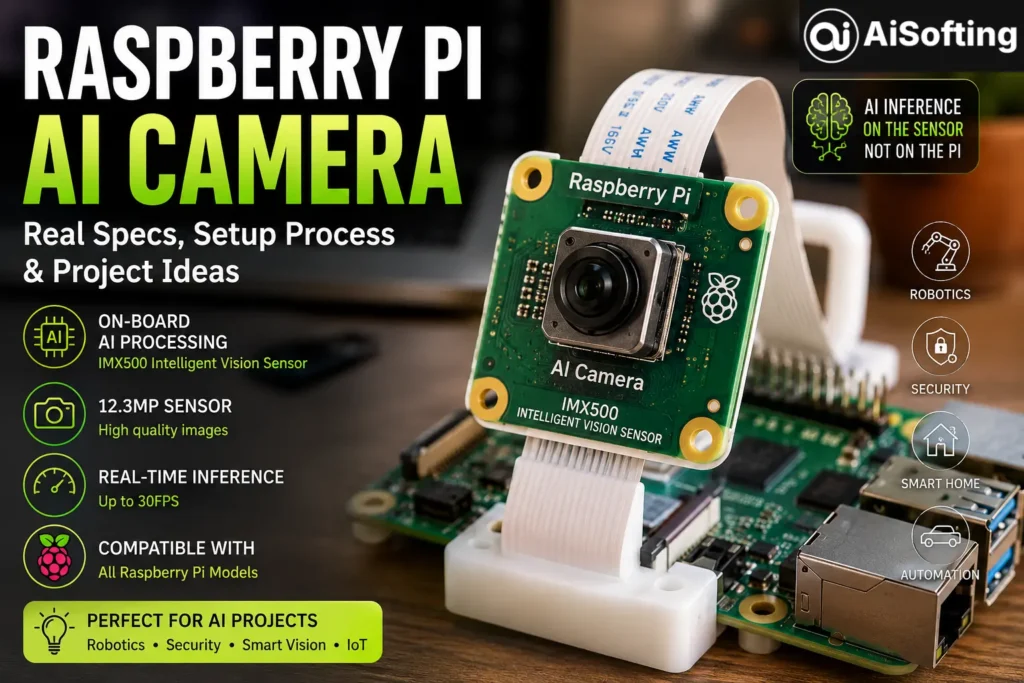
The Raspberry Pi AI Camera is a compact camera module built around the Sony IMX500 Intelligent Vision Sensor — a 12.3-megapixel CMOS image sensor with an onboard neural network accelerator built directly into the chip. That’s the headline feature: AI inference happens on the sensor itself, not on the Raspberry Pi’s own CPU, which frees up the host computer to handle other tasks while the camera does its own visual reasoning in real time.
Physically, it’s designed to slot right into the existing ecosystem — the PCB outline and mounting holes match the Raspberry Pi Camera Module 3, though the overall depth is a bit greater to accommodate the larger IMX500 sensor package. It connects via the standard CSI camera port and works with all Raspberry Pi computers, from a Pi 4 up through the Pi 5 and Compute Module boards.
How It’s Different From a Regular AI Webcam Setup
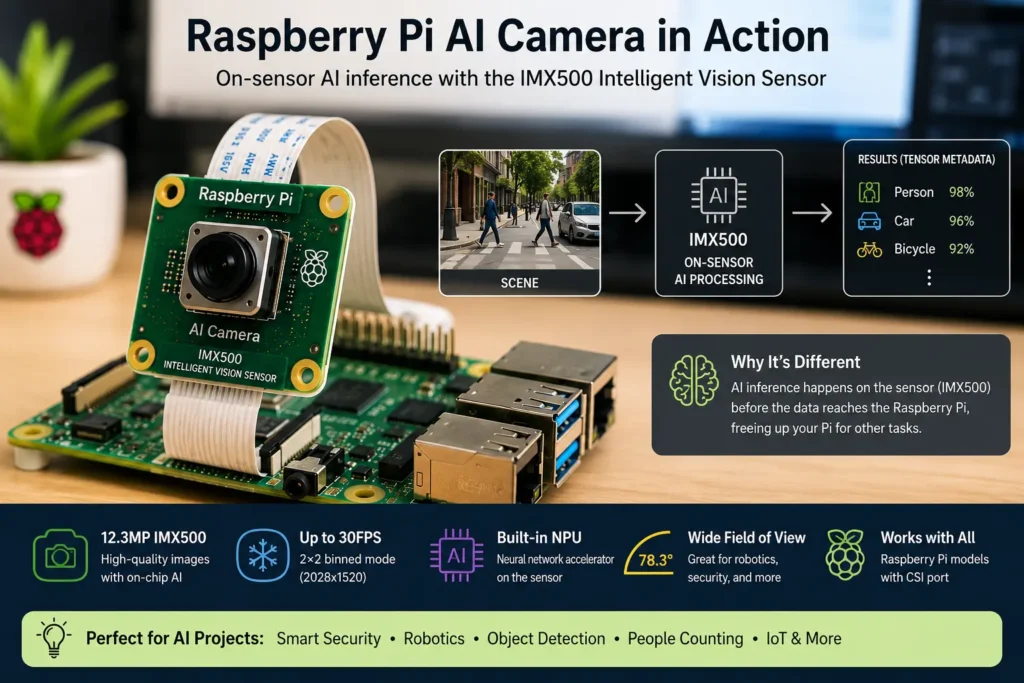
In a traditional AI camera setup, the camera just delivers raw images, and the Raspberry Pi’s processor (sometimes paired with an external accelerator) does all the heavy lifting of running the AI model. The IMX500-based design flips that: a small onboard image signal processor turns the raw sensor data into an input tensor right there on the chip, runs inference, and sends the results — along with the image — back to the Pi. The host processor never has to run the neural network itself.
Key Specifications
- Sensor: 12.3MP Sony IMX500 Intelligent Vision Sensor with built-in neural network accelerator
- Framerates: Roughly 30fps at 2×2 binned resolution (2028×1520), or about 10fps at full resolution (4056×3040)
- Field of view: 78.3°
- Compatibility: Works with all Raspberry Pi models that have a CSI camera connector
- Software integration: Supported through libcamera, Picamera2, and the rpicam-apps application suite, with tensor metadata support built in
- Price: Around $70, which Tom’s Hardware called a lot for a camera module, but reasonable once you factor in that you’re also getting a built-in AI accelerator
- Production commitment: Raspberry Pi has stated the module will remain in production until at least January 2028, which matters if you’re building something you’ll need replacement units for down the line
Setting Up the Raspberry Pi AI Camera
Step 1: Connect the Hardware
Before connecting anything, shut down your Raspberry Pi and disconnect it from power — this matters more than it sounds, since connecting camera hardware live can risk damage to the board or sensor. The camera ships with two ribbon cables (15-pin and 22-pin) to cover connection to different Raspberry Pi models, so pick the one that matches your board’s CSI port.
Step 2: Install the Software Stack
The camera works through Raspberry Pi’s existing camera software — libcamera and Picamera2 — rather than requiring a completely separate toolchain. This is one of the more beginner-friendly aspects of the setup: if you’ve used a standard Raspberry Pi camera module before, the workflow will feel familiar.
Step 3: Load a Neural Network Model
The camera ships with a pre-loaded MobileNet model ready to go for basic object detection out of the box, so you can test functionality without training or converting anything yourself. For more advanced use, Raspberry Pi provides tools to convert your own PyTorch or TensorFlow models to run on the sensor’s accelerator.
Step 4: Access Tensor Metadata in Your Application
Once running, the camera doesn’t just hand you an image — it augments the captured still or video with tensor metadata, which your application can read directly through the Picamera2 library. This is what lets you build responsive logic (like triggering an alert when a person is detected) without writing your own inference pipeline from scratch.
Real-World Project Ideas
- Object detection and counting — using the pre-loaded MobileNet model to detect and count objects or people passing through a frame in real time.
- Pose detection and robotics — the camera’s fast pose detection capability makes it a genuinely strong fit for robotics projects that need to react to human movement or positioning.
- Home and perimeter security — commercial derivatives, like Arducam’s outdoor PoE security camera kit built around the same IMX500 sensor, extend this into weatherproofed enclosures for perimeter monitoring and access control.
- Traffic and parking monitoring — the sensor’s on-chip inference makes it viable for lower-power installations tracking vehicle presence or counts without needing a full server nearby.
- Wildlife or activity cameras — combining motion-triggered capture with on-device classification to log specific activity without streaming constant footage to the cloud.
Benefits of the Raspberry Pi AI Camera
- On-sensor inference — AI processing happens without taxing the Raspberry Pi’s own CPU, which matters a lot for projects running other tasks simultaneously.
- No separate accelerator needed — unlike some AI Kit setups that require a PCIe-based accelerator, this camera handles inference itself, which also frees up the PCIe port for other uses on boards that have one.
- Beginner-friendly software path — integration with the existing libcamera and Picamera2 ecosystem means you’re not learning an entirely new toolchain.
- Genuine privacy advantage — because inference can happen locally on the sensor, there’s less need to send raw footage to the cloud for processing, which matters for security and privacy-sensitive projects.
- Long production runway — a stated production commitment through at least 2028 gives some confidence for people building products or repeatable installations around it.
Common Mistakes and Things to Watch For
- Assuming a Pi 4 will feel identical to a Pi 5 in every project. A Raspberry Pi 4 can handle basic detection tasks reasonably well, but a Pi 5 generally offers noticeably better performance for more demanding real-time AI work.
- Handling the board carelessly during connection. The camera’s guidance is explicit about avoiding mechanical or electrical damage while handling the PCB and connectors, and about always powering down before connecting or disconnecting it.
- Ignoring temperature and environmental conditions. Rapid temperature swings can cause moisture buildup that affects image quality, and this becomes especially relevant for outdoor-housed variants, where documented operating ranges can vary between the product page and the official datasheet — worth double-checking both before deploying somewhere with real temperature swings.
- Expecting full-resolution video at high frame rates. Full 12.3MP resolution tops out around 10fps; if your project needs faster real-time tracking, the 2×2 binned mode at roughly 30fps is the more realistic setting to design around.
- Skipping the official documentation in favor of forum posts. The Picamera2 and tensor metadata implementation has enough nuance that it’s worth working directly from Raspberry Pi’s official documentation rather than piecing it together secondhand.
Best Practices
- Start with the pre-loaded MobileNet model before attempting custom model conversion, just to confirm your hardware and software stack are working correctly.
- Use a Raspberry Pi 5 if your project involves real-time detection at higher frame rates or more complex models.
- Keep the camera in a well-ventilated environment, and if it’s inside an enclosure, make sure that enclosure doesn’t trap heat.
- If you’re building something for outdoor or industrial deployment, look closely at IP-rated enclosure options rather than trying to weatherproof the bare module yourself.
Personal Experience
I picked up a Raspberry Pi AI Camera mainly out of curiosity about how well “AI on the sensor” actually holds up outside of marketing copy, and I ended up using it for a small home project — a motion-aware camera that would flag when someone approached the front door versus just detecting general movement like wind-blown branches.
The setup itself was refreshingly straightforward. Because it plugs into the same software stack as a standard Pi camera module, I wasn’t fighting a brand-new toolchain — Picamera2 picked it up without much drama, and the pre-loaded MobileNet model gave me working object detection within the first hour, which is not something I can say about every AI hardware accessory I’ve tested.
Where I hit friction was frame rate expectations. I initially assumed I’d get full-resolution images at a smooth frame rate for a fairly responsive detection loop, and quickly learned that full 12.3MP resolution really is closer to 10fps, not something snappy. Switching to the 2×2 binned mode fixed the responsiveness problem immediately, but it was a good reminder to actually read the framerate specs before designing around an assumption.
The other lesson came from running the camera in a partially enclosed outdoor housing during a stretch of unusually cold weather. Image quality noticeably degraded, and it took me a while to connect that back to the documented operating range — the camera is rated for a fairly wide temperature tolerance, but stable image quality has a narrower guaranteed range than the “will it turn on” range. If you’re building anything for outdoor use, I’d strongly recommend checking both the product page and datasheet specs directly rather than assuming they always agree — in my experience with these Sony IMX500-based modules, they sometimes don’t line up exactly.
FAQs
1. What makes the Raspberry Pi AI Camera different from a regular Pi camera module?
The Raspberry Pi AI Camera uses the Sony IMX500 sensor, which has a built-in neural network accelerator that performs AI inference directly on the chip, rather than relying on the Raspberry Pi’s CPU or a separate accelerator to process the image.
2. Do I need a Raspberry Pi 5, or does the AI Camera work with a Pi 4?
It’s compatible with all Raspberry Pi models that have a CSI camera connector, including the Pi 4. That said, a Pi 5 generally delivers better overall performance for more demanding real-time AI applications.
3. Does the Raspberry Pi AI Camera require an internet connection to work?
No — because inference happens on the sensor itself, the camera can process visual data locally without needing to send footage to the cloud, which is a meaningful privacy and latency advantage for many projects.
4. What frame rate can I expect from the Raspberry Pi AI Camera?
At full 12.3MP resolution, expect around 10fps. Using the 2×2 binned mode (2028×1520) bumps that up to roughly 30fps, which is generally the better choice for real-time detection tasks.
5. Can I run my own custom AI models on the Raspberry Pi AI Camera?
Yes — beyond the pre-loaded MobileNet model, Raspberry Pi provides tools to convert PyTorch and TensorFlow models to run on the IMX500’s onboard accelerator.
6. Is the Raspberry Pi AI Camera worth the price?
At around $70, it’s more expensive than a basic Pi camera module, but reviewers have generally found it a strong value once you account for the built-in AI accelerator, which eliminates the need for a separate add-on board.
7. Can the Raspberry Pi AI Camera be used outdoors?
The base module itself isn’t weatherproofed, but IP-rated enclosure kits built around the same IMX500 sensor exist for outdoor and security-focused deployments. Always check the documented operating and image-stability temperature ranges before an outdoor install.
Conclusion
The Raspberry Pi AI Camera genuinely delivers on its core promise: real-time, on-sensor AI inference in a compact, affordable module that plugs into hardware and software most Raspberry Pi users already know. It’s not flawless — frame rate trade-offs at full resolution and some documentation inconsistencies around temperature specs are worth knowing about upfront — but for robotics, home automation, and edge AI experimentation, it’s one of the more practical entry points into vision-based AI available right now.
Actionable takeaways:
- Match your frame rate expectations to the resolution mode you’re actually using — binned mode for speed, full resolution for detail.
- Start with the pre-loaded MobileNet model before jumping into custom model conversion.
- Double-check environmental and temperature specs against both the product page and official datasheet before any outdoor deployment.
- Pair it with a Raspberry Pi 5 if your project needs faster, more demanding real-time inference.
If you’re building a broader hardware or software product around edge AI concepts like this, it helps to have the surrounding technical foundation just as solid — see how custom web development services can support a companion app or dashboard for a hardware project, and how professional SEO strategy helps your project or product actually get discovered once it’s built.
For further reading, see Sony’s official overview of the IMX500 Intelligent Vision Sensor, Tom’s Hardware’s in-depth review of the Raspberry Pi AI Camera, and CNX Software’s coverage of IMX500-based hardware developments.
Disclaimer: This article is for general informational purposes only and does not constitute technical or purchasing advice. Specifications, pricing, and availability mentioned here may change over time — always verify current details on Raspberry Pi’s official documentation before purchasing or building a project. This content is not affiliated with or endorsed by Raspberry Pi Ltd. or Sony.